(→Delayed Tia Thurnax: two -> 2) |
SrslySirius (talk | contribs) No edit summary |
||
| Line 3: | Line 3: | ||
Many aggressive builds are difficult or impossible to overcome if the opponent does not anticipate them and adjust accordingly. Familiarizing oneself with these builds is helpful in finding opportunities to use these tactics as well as learning to counter them. |
Many aggressive builds are difficult or impossible to overcome if the opponent does not anticipate them and adjust accordingly. Familiarizing oneself with these builds is helpful in finding opportunities to use these tactics as well as learning to counter them. |
||
| + | The following notation is used for all build orders in this article. These apply to base set units. Random set units will be fully spelled out, unless otherwise noted. |
||
| ⚫ | |||
| + | |||
| + | * A: Animus |
||
| + | * B: Blastforge |
||
| + | * C: Conduit |
||
| ⚫ | |||
| + | * E: Engineer |
||
| + | * F: Forcefield |
||
| + | * G: Gauss Cannon |
||
| + | * R: Rhino |
||
| + | * S: Steelsplitter |
||
| + | * T: Tarsier |
||
| + | * W: Wall |
||
| + | |||
| + | The majority of these openings are only available to Player 2, due to starting with an extra drone. In most cases Player 1 will be one or two gold short when attempting a P2 opening. However, many of the openings do become available to Player 1 if Doomed Drone is in the set. Examples of this include Delayed Tia Thurnax, Tatsu Nullifier Rush, and Double Scorchilla. |
||
| + | |||
| + | ==Tia Thurnax== |
||
{{Manual unit panels| |
{{Manual unit panels| |
||
| Line 9: | Line 25: | ||
}} |
}} |
||
| + | ===Naked Tia=== |
||
| ⚫ | |||
| + | |||
| + | This is the standard Tia Thurnax rush, available to Player 2. |
||
| + | |||
| ⚫ | |||
| ⚫ | |||
| ⚫ | |||
| + | # ... Tia Thurnax* (8 gold and 1 Red remaining) |
||
| + | |||
| ⚫ | |||
| + | |||
| + | None yet. |
||
| + | |||
| + | ===Chrono Tia=== |
||
| + | |||
| + | If Chrono Filter happens to be in a set with Tia Thurnax, it is possible to land a Turn 3 Tia. This is perhaps the most aggressive and risky opening in the game. It is available to Player 2. |
||
| + | |||
| ⚫ | |||
| + | # ... C + Chrono Filter |
||
| + | # ... Tia Thurnax* (4 gold and 1 Blue remaining) |
||
| + | |||
| + | The Turn 1 play DC is highly unusual and should arouse suspicion. |
||
| + | |||
| + | ====Replays==== |
||
| + | |||
| + | None yet. |
||
| + | |||
| ⚫ | |||
| + | |||
| ⚫ | |||
The delayed Tia Thurnax build is available to player 2. |
The delayed Tia Thurnax build is available to player 2. |
||
| Line 26: | Line 71: | ||
''This build severely punishes opponents that opt for a high economy strategy. If Thurnax is available, going for triple Drones probably is suicidal."'' |
''This build severely punishes opponents that opt for a high economy strategy. If Thurnax is available, going for triple Drones probably is suicidal."'' |
||
| − | ===Replays=== |
+ | ====Replays==== |
Pseudoradius vs. ChoKosoku: http://play.prismata.net/?r=H4T0j-4Nqdf |
Pseudoradius vs. ChoKosoku: http://play.prismata.net/?r=H4T0j-4Nqdf |
||
| Line 32: | Line 77: | ||
Pseudoradius vs. DrTasslehoff: http://play.prismata.net/?r=6EY+P-zADjr |
Pseudoradius vs. DrTasslehoff: http://play.prismata.net/?r=6EY+P-zADjr |
||
| − | == |
+ | ==Shadowfang== |
{{Manual unit panels| |
{{Manual unit panels| |
||
Shadowfang |
Shadowfang |
||
}} |
}} |
||
| + | |||
| + | ===Turn 3 Rush=== |
||
This is an extremely aggressive opening and is telegraphed by cutting a drone on turn 1. It is available to Player 2: |
This is an extremely aggressive opening and is telegraphed by cutting a drone on turn 1. It is available to Player 2: |
||
| Line 53: | Line 100: | ||
On the other hand, if the opponent does not recognize the Shadowfang rush on Turn 1 and fails to adjust, the rush can still be extremely effective. |
On the other hand, if the opponent does not recognize the Shadowfang rush on Turn 1 and fails to adjust, the rush can still be extremely effective. |
||
| − | ===Replays=== |
+ | ====Replays==== |
Hexmage vs. Kulenych: http://play.prismata.net/?r=SkHXV-pTguZ |
Hexmage vs. Kulenych: http://play.prismata.net/?r=SkHXV-pTguZ |
||
| Line 63: | Line 110: | ||
Lunarch Studios - Why We Nerfed Shadowfang: https://www.youtube.com/watch?v=puZ7kcMDZYA |
Lunarch Studios - Why We Nerfed Shadowfang: https://www.youtube.com/watch?v=puZ7kcMDZYA |
||
| + | ===RhinoFang=== |
||
| ⚫ | |||
| ⚫ | |||
| − | {{Manual unit panels| |
||
| ⚫ | |||
| − | }} |
||
| + | # ... DD |
||
| ⚫ | |||
| + | # ... DD |
||
| + | # ... AAD |
||
| ⚫ | |||
| ⚫ | |||
| + | # ... etc... |
||
| + | ====Replays==== |
||
| ⚫ | |||
| ⚫ | |||
| ⚫ | |||
| ⚫ | |||
| ⚫ | |||
| ⚫ | |||
| ⚫ | |||
| ⚫ | |||
| − | == |
+ | ==Tatsu Nullifier== |
| − | |||
| ⚫ | |||
| − | |||
| − | ==Tatsu Nullifier Rush== |
||
{{Manual unit panels| |
{{Manual unit panels| |
||
| Line 90: | Line 131: | ||
}} |
}} |
||
| + | ===Turn 4 Rush=== |
||
| ⚫ | |||
| + | |||
| ⚫ | |||
This build order is available to player two. |
This build order is available to player two. |
||
| Line 102: | Line 145: | ||
# ... Tatsu |
# ... Tatsu |
||
| − | ===Replays=== |
+ | ====Replays==== |
Srslysirius vs. Medar: http://play.prismata.net/?r=fXn1E-m0LB+ |
Srslysirius vs. Medar: http://play.prismata.net/?r=fXn1E-m0LB+ |
||
| Line 108: | Line 151: | ||
iminaBearSuit demonstrates the Tatsu rush: https://www.youtube.com/watch?v=iWkW-AuJIS4 |
iminaBearSuit demonstrates the Tatsu rush: https://www.youtube.com/watch?v=iWkW-AuJIS4 |
||
| − | == |
+ | ===Delayed Tatsu=== |
| + | |||
| + | This opening grants the player enough resources to get a Tatsu Nullifier and a Wall each turn. Unlike a typical Tatsu Rush, this strategy can not be defeated simply by buying Gauss Cannons or other breach resistant attackers. However, it is a few turns slower. |
||
| + | |||
| + | The Delayed Tatsu can easily overwhelm opponents that do not manage to mount early pressure. This opening is available to Player 1. |
||
| + | |||
| + | # DD |
||
| + | # DDE |
||
| + | # DDD |
||
| + | # DDDB |
||
| + | # DAA |
||
| + | # Tatsu + Wall |
||
| + | # Tatsu + Wall |
||
| + | # Tatsu + Wall |
||
| + | # Tatsu + Wall |
||
| + | |||
| + | If Drake, Omega Splitter, or Odin are also in the set, this may catch opponents off-gaurd, as the build initially resembles a standard Big Blue opening. |
||
| + | |||
| + | Player 2 can use a similar build order, resulting in additional drones. |
||
| + | |||
| + | ====Replays==== |
||
| + | |||
| + | Kulenych vs. zzz: http://play.prismata.net/?r=FQZaA-ird99 |
||
| + | |||
| + | ==Wild Drone== |
||
{{Manual unit panels| |
{{Manual unit panels| |
||
| + | Wild Drone |
||
| − | Shadowfang |
||
}} |
}} |
||
| ⚫ | |||
| ⚫ | |||
| ⚫ | |||
| ⚫ | |||
| ⚫ | |||
| ⚫ | |||
| ⚫ | |||
| ⚫ | |||
| ⚫ | |||
| ⚫ | |||
| ⚫ | |||
| ⚫ | |||
| ⚫ | |||
| ⚫ | |||
| ⚫ | |||
| ⚫ | |||
| ⚫ | |||
| ⚫ | |||
| + | ====Replays==== |
||
| ⚫ | |||
| + | |||
| ⚫ | |||
| + | |||
| + | ==Scorchilla== |
||
{{Manual unit panels| |
{{Manual unit panels| |
||
Scorchilla |
Scorchilla |
||
}} |
}} |
||
| + | |||
| ⚫ | |||
Because of Player 2's ability to buy a natural conduit on turn 2 (a common line in any set), the Double Scorchilla opening is frequently seen when the unit is available. |
Because of Player 2's ability to buy a natural conduit on turn 2 (a common line in any set), the Double Scorchilla opening is frequently seen when the unit is available. |
||
| Line 140: | Line 213: | ||
# ... Scorchilla x2 |
# ... Scorchilla x2 |
||
| − | An alternative line is to delay the 2 Scorchillas and threaten them on subsequent turns, while building |
+ | An alternative line is to delay the 2 Scorchillas and threaten them on subsequent turns, while building Tarsiers. Like so: |
# ... DD |
# ... DD |
||
| Line 148: | Line 221: | ||
# ... Option to Scorchilla x2 |
# ... Option to Scorchilla x2 |
||
| − | ===Replays=== |
+ | ====Replays==== |
None yet. |
None yet. |
||
| − | ==Asteri Cannon |
+ | ==Asteri Cannon== |
{{Manual unit panels| |
{{Manual unit panels| |
||
| Line 158: | Line 231: | ||
}} |
}} |
||
| + | ===Turn 4 Rush=== |
||
| ⚫ | |||
| + | |||
| ⚫ | |||
# ... DD |
# ... DD |
||
| Line 169: | Line 244: | ||
This build order is very aggressive, not only due to the damage provided by Asteri Cannon, but also because its Forcefields allow the player to spend less on defense. However, this comes at the cost of cutting multiple drones and usually results in an initial economic disadvantage. |
This build order is very aggressive, not only due to the damage provided by Asteri Cannon, but also because its Forcefields allow the player to spend less on defense. However, this comes at the cost of cutting multiple drones and usually results in an initial economic disadvantage. |
||
| − | ===Replays=== |
+ | ====Replays==== |
None yet. |
None yet. |
||
Revision as of 23:26, 10 January 2015
Unlike chess and some other games of complete information, Prismata does not require rote memorization or extensive opening book study to be highly competitive. However, it can still be helpful to be aware of some common build orders.
Many aggressive builds are difficult or impossible to overcome if the opponent does not anticipate them and adjust accordingly. Familiarizing oneself with these builds is helpful in finding opportunities to use these tactics as well as learning to counter them.
The following notation is used for all build orders in this article. These apply to base set units. Random set units will be fully spelled out, unless otherwise noted.
- A: Animus
- B: Blastforge
- C: Conduit
- D: Drone
- E: Engineer
- F: Forcefield
- G: Gauss Cannon
- R: Rhino
- S: Steelsplitter
- T: Tarsier
- W: Wall
The majority of these openings are only available to Player 2, due to starting with an extra drone. In most cases Player 1 will be one or two gold short when attempting a P2 opening. However, many of the openings do become available to Player 1 if Doomed Drone is in the set. Examples of this include Delayed Tia Thurnax, Tatsu Nullifier Rush, and Double Scorchilla.
Tia Thurnax
Naked Tia
This is the standard Tia Thurnax rush, available to Player 2.
- ... DD
- ... DDC
- ... AC
- ... Tia Thurnax* (8 gold and 1 Red remaining)
Replays
None yet.
Chrono Tia
If Chrono Filter happens to be in a set with Tia Thurnax, it is possible to land a Turn 3 Tia. This is perhaps the most aggressive and risky opening in the game. It is available to Player 2.
- ... DC
- ... C + Chrono Filter
- ... Tia Thurnax* (4 gold and 1 Blue remaining)
The Turn 1 play DC is highly unusual and should arouse suspicion.
Replays
None yet.
Delayed Tia Thurnax
Compared to the Naked Tia, this opening gets an extra 3 drones and 2 Tarsiers that attack the same turn as Tia, at the cost of only one additional turn.
The delayed Tia Thurnax build is available to player 2.
- ... DD
- ... DDC
- ... DA
- ... DDTT
- ... DDT + Tia Thurnax
This build order was shared by Pseudoradius on the Prismata subreddit, where he stated:
"This gives you 9 Attack on turn 6 and leaves you with 9 Drones. Enough to go double Tarsier or Tarsier + Rhino every turn afterwards.
This build severely punishes opponents that opt for a high economy strategy. If Thurnax is available, going for triple Drones probably is suicidal."
Replays
Pseudoradius vs. ChoKosoku: http://play.prismata.net/?r=H4T0j-4Nqdf
Pseudoradius vs. DrTasslehoff: http://play.prismata.net/?r=6EY+P-zADjr
Shadowfang

Turn 3 Rush
This is an extremely aggressive opening and is telegraphed by cutting a drone on turn 1. It is available to Player 2:
- ... D
- ... AA
- ... Shadowfang
Astute opponents can easily counter this if they recognize it on Turn 1. A common counter is to cut a drone themselves on turn 2 to rush out a Blastforge, then follow up with a Steelsplitter, and later a Wall. Applying minimal but immediate pressure to the Shadowfang rusher will crush the strategy. This counter was even effective prior to the Shadowfang nerf on September 2014.
However, Player 2 is not obligated to follow through with the rush on Turn 2. As Prismata developer Elyot notes, the Turn 1 play can actually be an effective gambit:
"The true power of this opening isn't just that you can double animus. It's that you can completely switch away and do DDB or DDA if your opponent tries too hard to stop you. If your opponent overcompensates and does something really defensive, you can just NOT go AA and then be ahead."
On the other hand, if the opponent does not recognize the Shadowfang rush on Turn 1 and fails to adjust, the rush can still be extremely effective.
Replays
Hexmage vs. Kulenych: http://play.prismata.net/?r=SkHXV-pTguZ
Argeiphontes vs. Elyot (Scorchilla Cup): http://play.prismata.net/?r=v@QbO-0BfNq
x3degree vs. SrslySirius: http://play.prismata.net/?r=jd9TP-QwY26
Lunarch Studios - Why We Nerfed Shadowfang: https://www.youtube.com/watch?v=puZ7kcMDZYA
RhinoFang
Similar to the Delayed Tia Thurnax opening, this build gets out a Shadowfang one turn later than the fastest possible route, but compensates with the resources to play Shadowfang + Rhino every turn. It is available to Player 2.
- ... DD
- ... DD
- ... AAD
- ... Shadowfang + Rhino
- ... Shadowfang + Rhino
- ... etc...
Replays
SrslySirius vs. Rheb: http://play.prismata.net/?r=GqcB7-Vxn37
Tatsu Nullifier
Turn 4 Rush
The Tatsu Rush is extremely effective against Blue and Red strategies. However, it is easily countered by Gauss Cannons, which are naturally resistant to breaches.
This build order is available to player two.
- ... DD
- ... DD
- ... DAA
- ... Tatsu
- ... Tatsu
- ... Tatsu
- ... Tatsu
Replays
Srslysirius vs. Medar: http://play.prismata.net/?r=fXn1E-m0LB+
iminaBearSuit demonstrates the Tatsu rush: https://www.youtube.com/watch?v=iWkW-AuJIS4
Delayed Tatsu
This opening grants the player enough resources to get a Tatsu Nullifier and a Wall each turn. Unlike a typical Tatsu Rush, this strategy can not be defeated simply by buying Gauss Cannons or other breach resistant attackers. However, it is a few turns slower.
The Delayed Tatsu can easily overwhelm opponents that do not manage to mount early pressure. This opening is available to Player 1.
- DD
- DDE
- DDD
- DDDB
- DAA
- Tatsu + Wall
- Tatsu + Wall
- Tatsu + Wall
- Tatsu + Wall
If Drake, Omega Splitter, or Odin are also in the set, this may catch opponents off-gaurd, as the build initially resembles a standard Big Blue opening.
Player 2 can use a similar build order, resulting in additional drones.
Replays
Kulenych vs. zzz: http://play.prismata.net/?r=FQZaA-ird99
Wild Drone
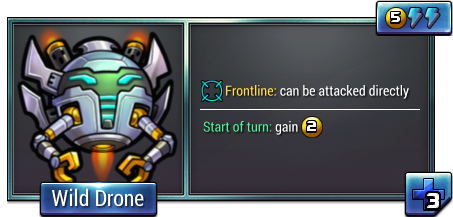
Mass Economy
When Wild Drones are available, it is possible to go for a super economy more efficiently than with regular drones.
Either player can spam Wild Drones, but the build order is more natural for Player 1:
- 1
- 1EE
- 11
- 11EE
- 111
The unit Wild Drone is denoted by 1
Replays
Will vs. Timex: http://play.prismata.net/?r=aGUHg-txnf7
Scorchilla
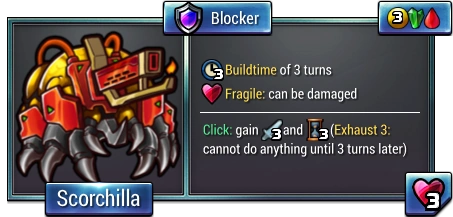
Double Scorchilla
Because of Player 2's ability to buy a natural conduit on turn 2 (a common line in any set), the Double Scorchilla opening is frequently seen when the unit is available.
- ... DD
- ... DDC
- ... DA
- ... Scorchilla x2
An alternative line is to delay the 2 Scorchillas and threaten them on subsequent turns, while building Tarsiers. Like so:
- ... DD
- ... DDC
- ... DA
- ... DDTT
- ... Option to Scorchilla x2
Replays
None yet.
Asteri Cannon
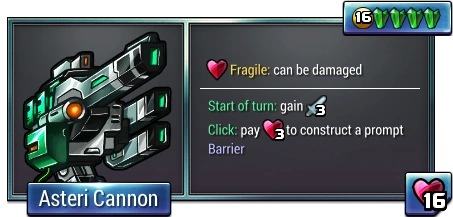
Turn 4 Rush
This opening seeks to play an Asteri Cannon at the earliest possible opportunity. It is available to Player 2.
- ... DD
- ... DDC
- ... DC
- ... Asteri Cannon
The natural conduit on turn 2 is extremely common in all sets, but the cut drone and extra conduit on Turn 3 should clearly signal the Asteri rush. The rush requires one to store 4 gold, allowing Asteri Cannon to be played with only 12 drones.
This build order is very aggressive, not only due to the damage provided by Asteri Cannon, but also because its Forcefields allow the player to spend less on defense. However, this comes at the cost of cutting multiple drones and usually results in an initial economic disadvantage.
Replays
None yet.